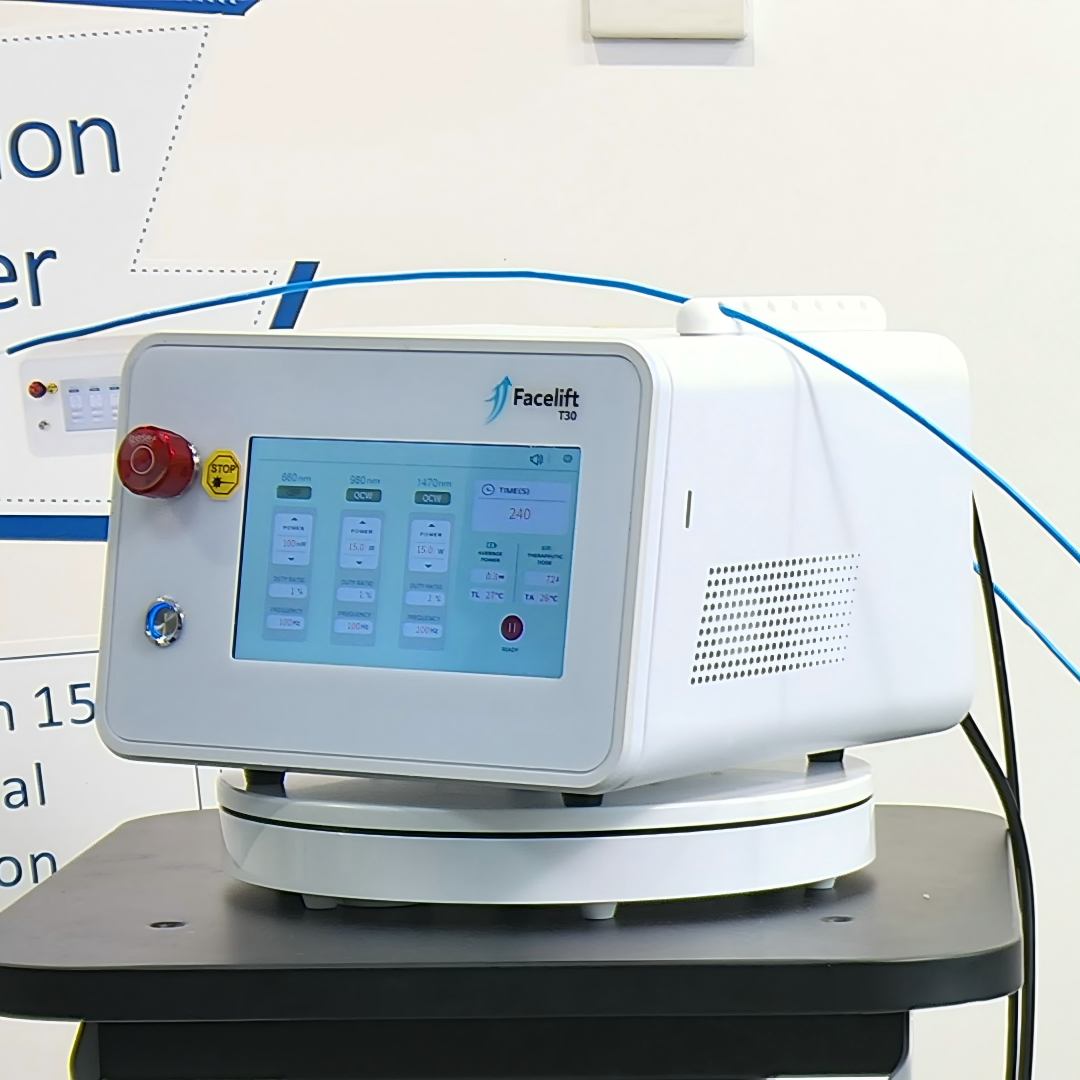
Periodontology: Three-Step Sequential Treatment Protocol
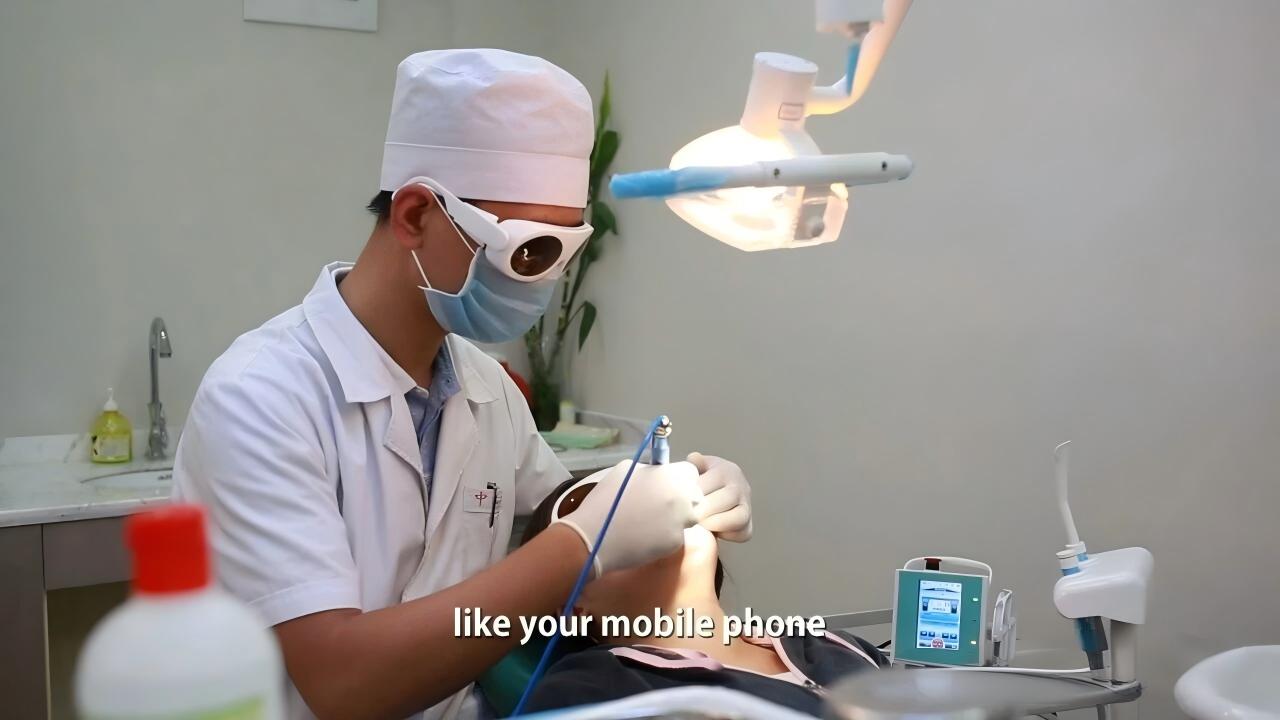
((A) Periodontal Pocket Disinfection (Disinfection Only)Objective: Eliminate pathogens within the periodontal pocket without damaging surrounding tissues.
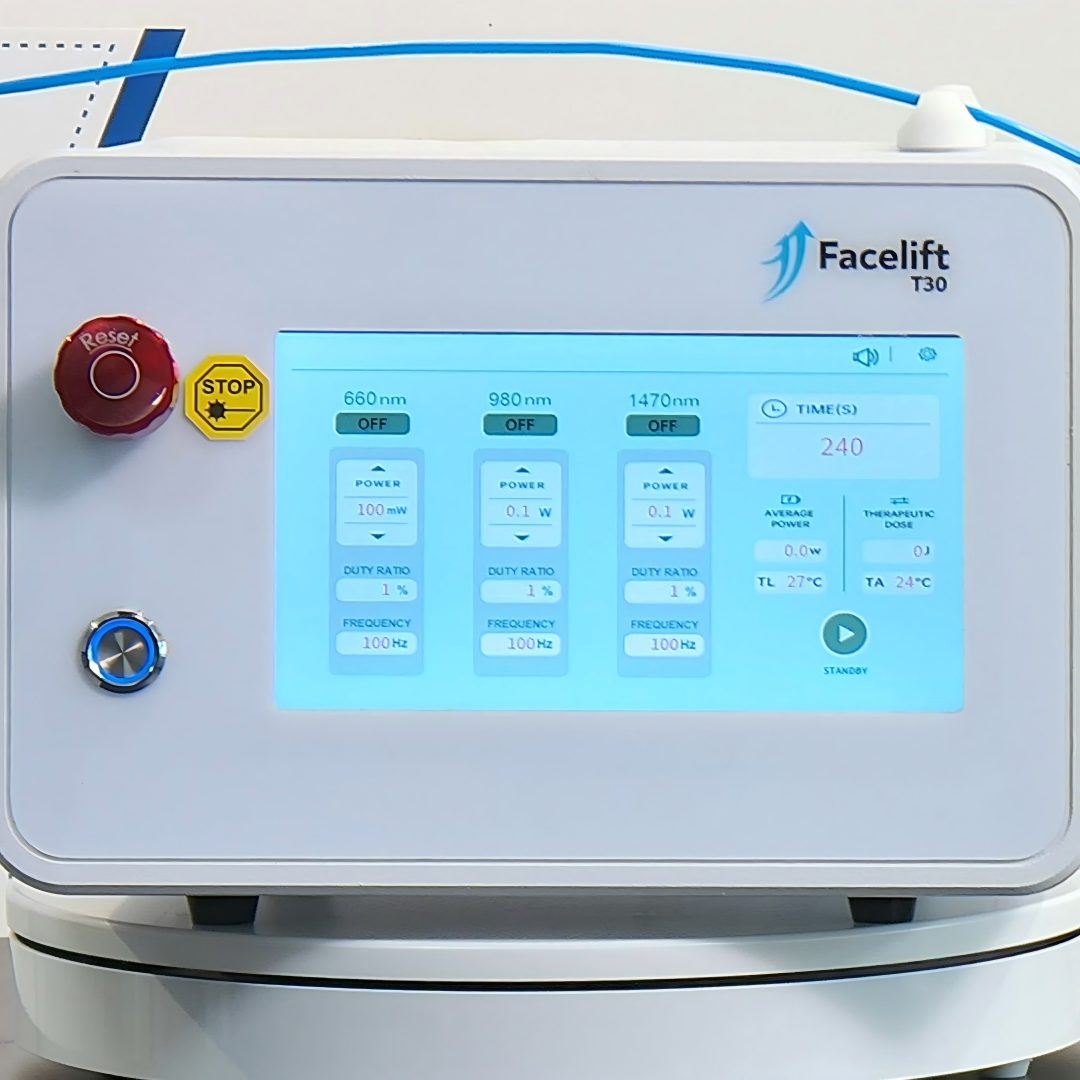
Working Mode: Pulsed wave (allows tissue cooling time)
Frequency: Should not be excessively high to ensure sufficient cooling intervals.
Fiber Condition: Non-carbonized — keep the fiber tip clean
- Select a 400 μm optical fiber
- Gently insert the shaped fiber down to the base of the periodontal pocket
- Perform horizontal (left-right) sweeping movements, repeat 3–5 times
- Ensure full coverage of the pocket inner wall
Horizontal left-right movements are easier to control than vertical (up-down) movements, as vertical movement may cause shifting of the laser spot. Maintain a moderate speed — neither too fast nor too slow.
(B) Removal of Granulation Tissue on Alveolar Socket Wall (Debridement)
Working Mode: Pulsed wave or continuous wave
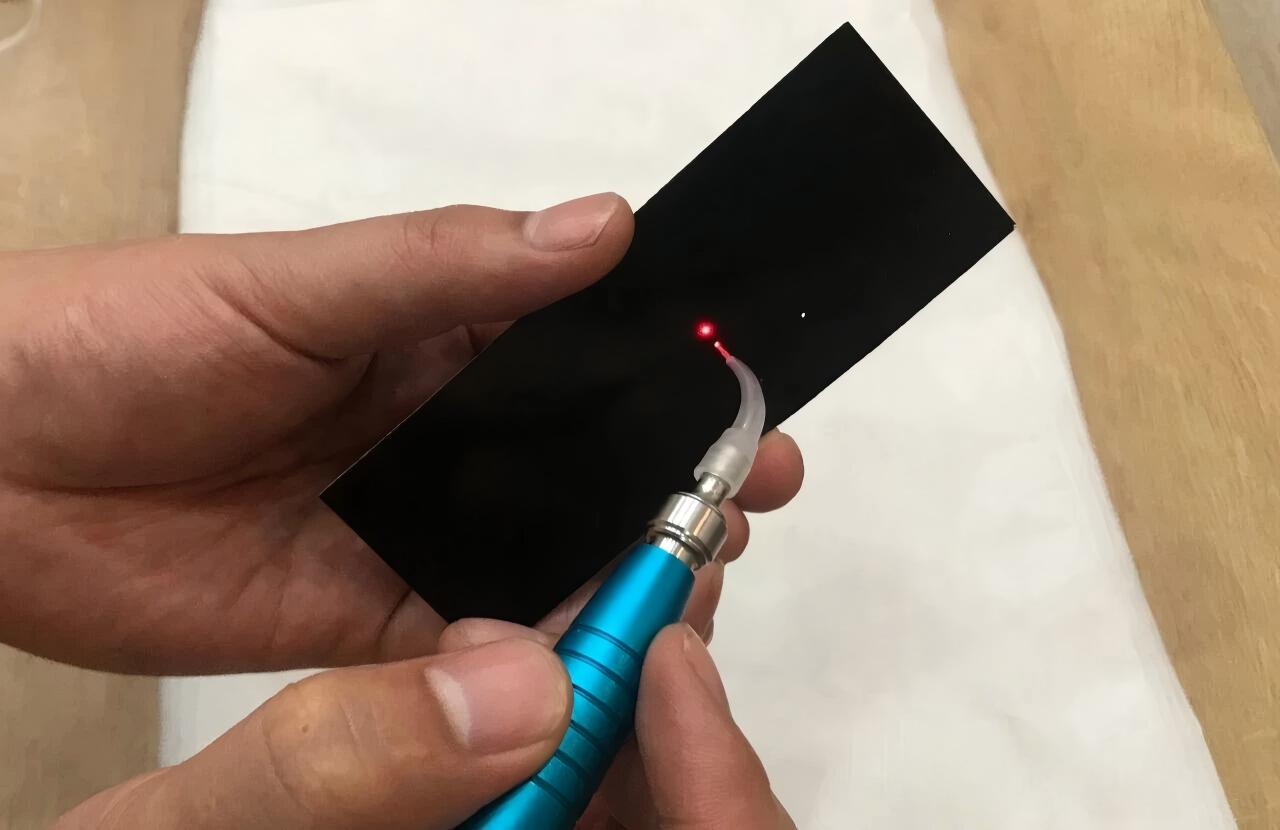
Fiber Condition: Must be carbonized
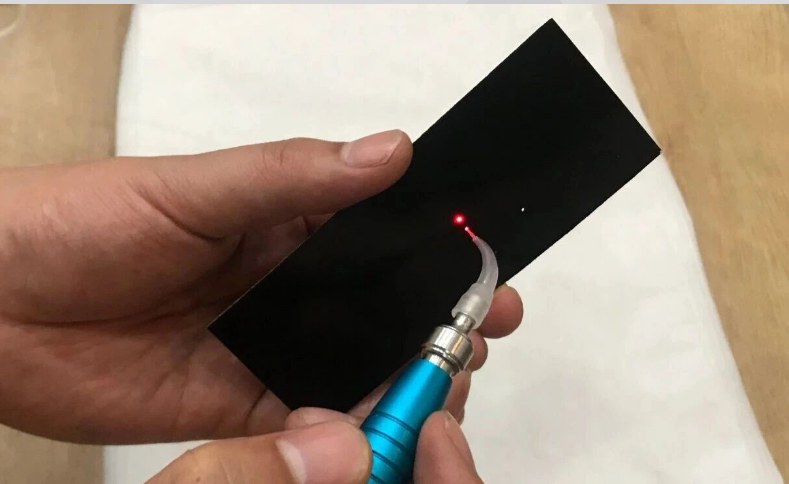
Carbonize the fiber tip (tap gently on articulating paper).
Insert the fiber to the bottom of the pocket.
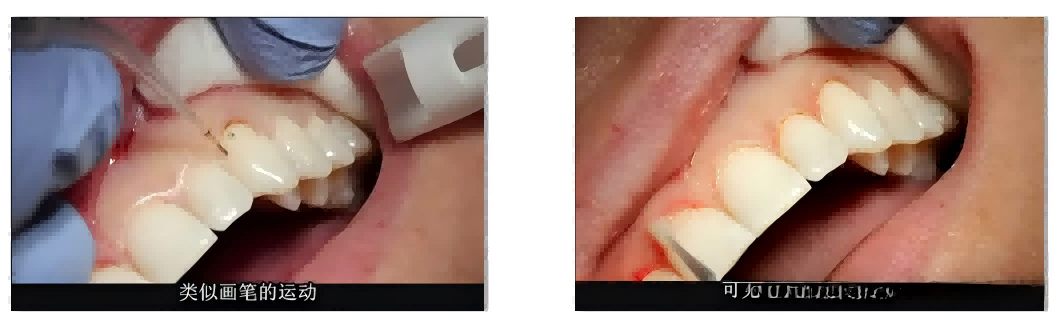
Perform horizontal (left-right) sweeping movements — the same technique adopted for disinfection.
The carbonized fiber facilitates removal of granulation tissue.
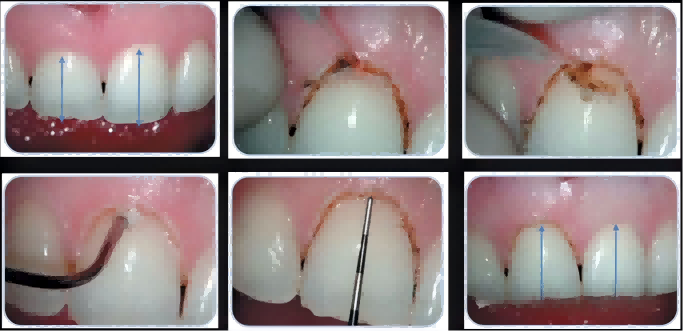
(C) Adjunctive Therapy for Chronic Periodontitis
Clinical Protocol (Combined Therapy: Laser + Scaling and Root Planing)
| Stage | Intervention | Objective |
|---|---|---|
| Before scaling | Laser disinfection of periodontal pockets | Reduce bacterial spread during instrumentation |
| During treatment | Conventional subgingival scaling and root planing | Cannot be overlooked! Calculus is the causative factor and must be removed mechanically. |
| After treatment | Laser disinfection or physical therapy for periodontal pockets | Disinfection and promotion of healing |
Why the Laser Must Be Combined with Scaling and Root Planing?
Comparative Overview
| Comparison Group | Laser + Scaling and Root Planing | Scaling and Root Planing Alone |
|---|---|---|
| Time to observe clinical improvement | Approximately 1 week | Approximately 1 month |
| Mechanism | Bacterial elimination + pathogen removal | Only elimination of causative factors |
| Patient experience | Rapid symptom relief | Slow progression of recovery |
Clinical Outcome Data
Clinical Differentiation of Combined Periodontal-Endodontic Lesions
| Clinical Manifestation | Etiology | Primary Treatment |
|---|---|---|
| Deep periodontal pockets presenting symptoms mimicking pulpitis | Periodontal origin | Treat periodontal disease first |
| Root canal infection inducing periodontal pocket formation | Endodontic origin | Manage the pulp first |
| Concurrent presence of both conditions, mutually causative | Dual etiology | The laser can treat both the root canal and periodontal pockets simultaneously — root canal disinfection combined with periodontal pocket disinfection delivers remarkably effective outcomes. |
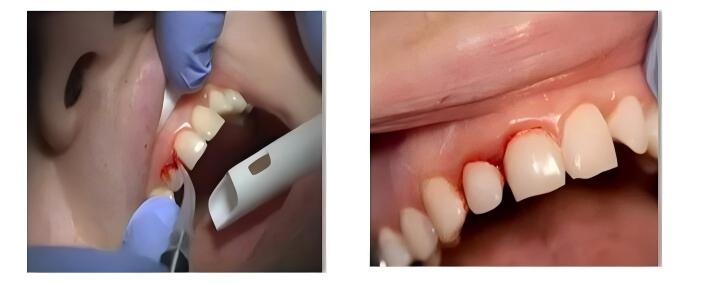
II. Implantology: Practical Techniques and Risk Control
(A) Second-Stage Implant Uncovering – Laser Circular Incision
Challenges
| Challenge | Explanation |
|---|---|
| Difficulty in positioning | Unlike scalpels, lasers provide no tactile feedback. Mispositioning will lead to irreversible excision of gingival tissue. |
| Risk of thermal injury | Implants are highly heat-sensitive; excessive temperature may compromise osseointegration. |
| Variation in gingival thickness | Thick gingiva requires longer cutting time and generates more heat accumulation. Thin gingiva may hinder tissue regeneration. |
Technique – Expansion Method (Non-Penetrating Incision)
Penetrating incision is not recommended due to low positioning accuracy.
Three Thermal Control Measures
| Measure | Implementation |
|---|---|
| 1. Intermittent footswitch activation | Avoid continuous pressing; sustained activation causes rapid heat buildup. |
| 2. Pulsed wave mode | Do not use continuous wave – allows tissue cooling between pulses. |
| 3. Saline irrigation | The assistant continuously flushes saline for cooling. |
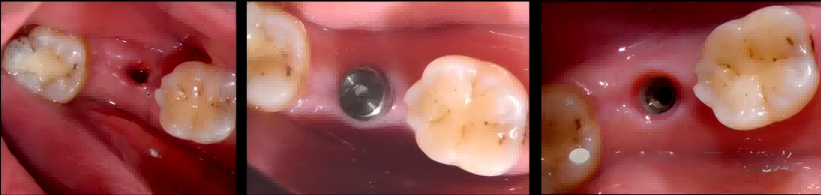
(B) Peri-Implantitis / Mucositis – Physiotherapy
Technique: Low-energy laser, non-contact irradiation to improve local microcirculation, reduce inflammation, and eliminate bacteria.
For bony involvement (peri-implantitis with bone loss):
-
Surgical flap reflection and debridement are mandatory – granulation tissue must be physically removed
-
Laser plays only an adjunctive role for disinfection and physiotherapy – it cannot replace surgical debridement
Clinical Value: Providing laser physiotherapy maintenance during routine recall visits not only gives patients the sense of receiving active treatment at every visit, but also effectively reduces the incidence of peri-implantitis. This is a powerful tool for building patient compliance with regular recall schedules.
III. Endodontics: Standardized Parameters and Procedure
(A) Root Canal Disinfection
Principle: Conventional chemical irrigants penetrate only 5–20 microns, while semiconductor laser can penetrate up to 700 microns or deeper. Bacteria hidden deep within dentinal tubules, which cannot be reached by medicaments, can be effectively targeted by laser.
Technique:
-
Use a 200 μm fiber (thinner, allowing insertion deep into the root canal)
-
Do not carbonize the fiber
-
After root canal preparation is complete, insert the fiber into the canal and irradiate with an up-down lifting motion
-
Can be used in conjunction with root canal irrigants
Important Note: The laser provides disinfection only – the standard procedures of root canal preparation and obturation cannot be omitted.
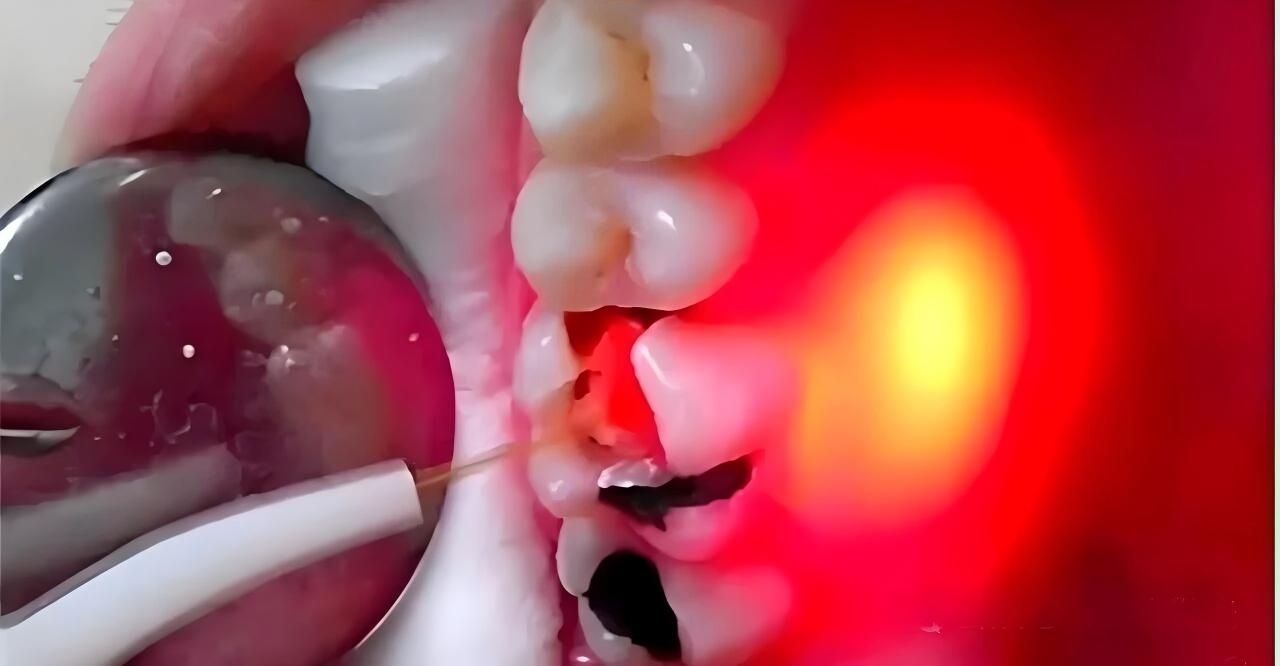
(B) Dentin Hypersensitivity Treatment – Step-by-Step Protocol
Step 1: Indication Assessment
First, identify the cause of the patient’s chief complaint of sensitivity:
| Condition | Laser Desensitization Effective? |
|---|---|
| Attrition, wedge-shaped defects, gingival recession → exposed dentin | Yes – the principle is to seal dentinal tubules |
| Pulpitis-induced pain | No – laser desensitization will not help |
Step 2: Tooth Surface Preparation
Keep the tooth surface dry (saliva interferes with the effect). Use a 2B pencil to draw over the sensitive area.
Safety of pencil application:
-
Pencil “lead” is actually graphite, not lead – non-toxic
-
Easily removed with a cotton pellet
-
Ink is not recommended – although it applies easily, it is very difficult to remove
-
Commercial proprietary staining agents are available but expensive (hundreds of euros for a few applications overseas) – the pencil is a cost-effective alternative
Step 3: Laser Irradiation
-
Fiber: Not carbonized
-
No local anesthesia – patient feedback (“does it hurt?”) is essential for controlling the endpoint
-
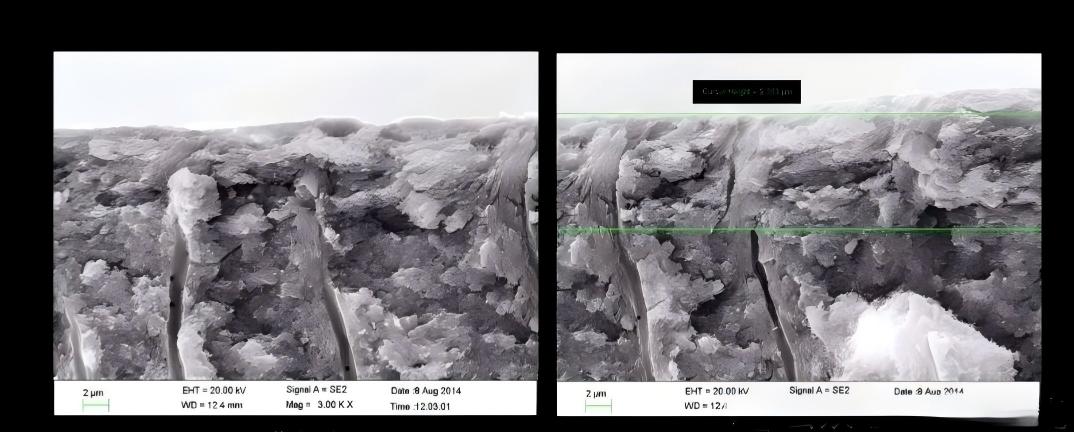
After irradiation, dentinal tubules appear sealed
Why No Local Anesthesia?
Desensitization requires a moderate amount of heat to seal the dentinal tubules, but the heat must be kept within a safe range. The patient’s verbal response of “pain” is the signal to stop. With anesthesia, there is no feedback, and the clinician may over-irradiate, potentially causing pulp damage.
Step 4: Post-Procedure Management
Desensitization is not permanent.
With normal brushing and eating, the sealed superficial dentinal tubules may become exposed again over time.
Patient communication: Inform the patient that if sensitivity recurs, they can return for another desensitization session – this does not mean the first treatment was unsuccessful.
Fluoride application timing:
-
Before desensitization – laser activates the fluoride effect
-
After desensitization – fluoride coating prolongs the duration of effect
-
Both approaches are supported by literature – either is acceptable
Not applicable to cracked teeth: Although a crack may appear very small, it is too large for the laser to seal.
IV. Oral Surgery: Key Points for Various Procedures
(A) Frenectomy
Labial Frenum Classification and Surgical Indications:
| Grade | Attachment Site | Indication for Surgery |
|---|---|---|
| I | Attached at the mucogingival junction | Generally not indicated (except for special surgical needs) |
| II | Inserts into the attached gingiva | May require surgery |
| III | Inserts into the interdental papilla | Frequently performed in pediatric dentistry |
| IV | Crosses the papilla to the palatal side | Generally recommended for excision |
Laser Excision Technique:
-
Administer local anesthesia → carbonize the fiber → proceed with cutting
Recommended “Three-Cut Method” (reported in literature):
| Cut | Direction | Extent |
|---|---|---|
| First | Vertical, along the papilla direction | 1.5–2 cm upward |
| Second | Arc-shaped from the starting point | To the junction of the mucogingival junction and the height of the central incisor contour |
| Third | Shapes the surgical area | Creating a diamond-shaped wound surface |
Lingual Frenectomy – Special Considerations:
| Precautions | Rationale |
|---|---|
| Avoid the floor of the mouth | The submandibular duct (Wharton’s duct) is located there |
| Cut along the tongue base and midline | Do not cut along the floor of the mouth |
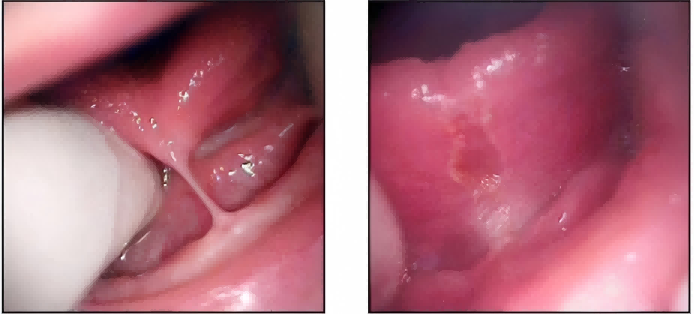
| Laser advantages | No bleeding; safer under general anesthesia; no sutures required |
(B) Mucocele Excision
Technique:
-
Administer local anesthesia
-
Lift the cyst using forceps or a suture
-
Carbonize the fiber; cut from all directions toward the center
-
After excision, apply physiotherapy to promote healing
Why Cut from All Directions?
Cutting in a single direction tends to inadvertently progress deeper, taking a long time to sever and potentially damaging deep tissues. Approaching from all directions provides better directional control and prevents cutting too deep.
(C) Epulis (Gingival Tumor) Excision
Pre-Operative Communication (Essential):
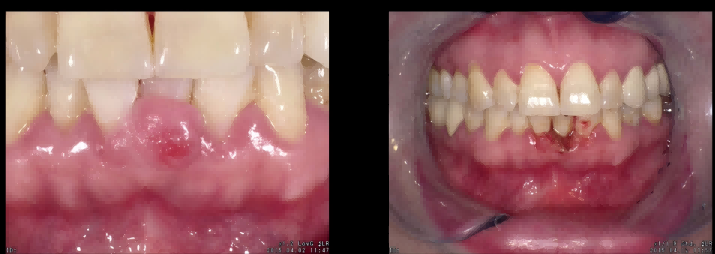
The patient must be informed of the possibility of recurrence. Epulis originates from periodontal ligament tissue; if the diseased tissue is not completely removed, recurrence is possible.
-
Laser advantage: Can treat the pathological tissue within the periodontal ligament while maximizing tooth preservation
-
However, if recurrence is frequent, tooth extraction may eventually be necessary
Technique: Carbonize the fiber → perforation-link cutting.
Bleeding is normal: Epulis contains abundant granulation tissue and blood vessels – bleeding upon excision is expected and not a cause for concern. For coagulation techniques, refer to Section IV(F) below (and Part One).
(D) Gingivoplasty and Crown Lengthening
How to Determine if the Gingiva Will Regrow After Cutting?
Assess the alveolar bone height.
| Condition | Assessment | Outcome |
|---|---|---|
| Biological width (distance from alveolar bone crest to gingival margin) > 2–3 mm | Gingiva is in a hyperplastic state | Will not regrow after excision |
| Bone height is within normal range, gingiva is merely swollen | Inflammation is the cause; swelling will subside with inflammation resolution | If too much is cut, black triangles will appear as gingiva naturally recedes |
Timing of Gingival Cutting:
Do NOT cut during inflammatory swelling!
| Reason | Explanation |
|---|---|
| 1. Prone to bleeding | Inflamed tissue bleeds more |
| 2. Inaccurate positioning | Once inflammation subsides, the gingiva will recede – you may over-cut |
| 3. Severe postoperative reaction | Patient experiences more discomfort |
Correct Approach: First use the laser for physiotherapy to reduce inflammation. Wait for the gingiva to return to its normal form before cutting.
Anterior Gingival Retraction – Caution:
Laser retraction essentially vaporizes a thin layer of the inner wall of the gingival sulcus.
| Area | Risk Level | Precautions |
|---|---|---|
| Anterior (thin gingiva) | High | Vaporized tissue may not grow back – affects esthetics |
| Posterior (thick gingiva) | Low | Relatively safe |
(F) Hemostasis (Coagulation) – Step-by-Step
This is the most frequently asked-about and most misunderstood procedure.
Step 1: Identify the Nature of the Bleeding
| Type of Bleeding | Laser Effectiveness | Action |
|---|---|---|
| Inflammatory bleeding (abundant granulation tissue) | Poor | Granulation tissue must be scraped away first before coagulation can be effective |
| Normal tissue bleeding (small vessel oozing) | Effective | Laser can reliably coagulate these vessels |
| Extraction socket bleeding (bony surface bleeding) | Do NOT use! | Laser heat will damage bone tissue, causing severe postoperative pain. Post-extraction laser is for soft-tissue physiotherapy only – do not treat the socket |
Step 2: Locate the Exact Bleeding Point
-
Apply pressure with a cotton pellet over the bleeding area
-
Immediately upon removal, identify the specific bleeding point
-
If an assistant is available, have them continuously blow air with the air syringe to keep the field clear
Step 3: Coagulation Technique
-
Carbonize the fiber tip
-
Directly contact the bleeding vessel or tissue with the carbonized fiber tip – do NOT just touch the surface clot!
-
Hold for 2–3 seconds
-
Press again with a cotton pellet, locate the next bleeding point, and coagulate
-
Repeat until bleeding stops
Why Do Many Clinicians Fail to Coagulate Effectively?
They only coagulate the surface clot, not the vessel itself.
The surface clot turns black and appears to have stopped bleeding, but when irrigated, bleeding resumes. You must identify the specific vessel/tissue point and have the carbonized fiber directly contact that point to achieve hemostasis.
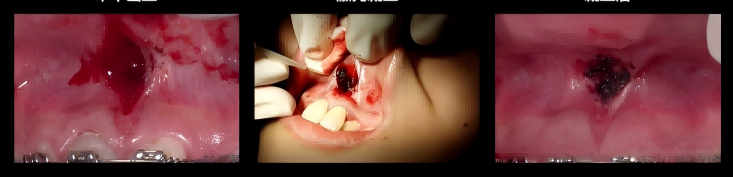
(A) Ulcer Physiotherapy
Technique: Non-contact, no carbonization, low energy – adjust until the patient feels a comfortable warmth.
Effects:
| Benefit | Explanation |
|---|---|
| Pain relief – the greatest value | Patients with severe pain can eat immediately after treatment |
| Healing promotion | Accelerates tissue repair |
Patient Expectation Management:
Physiotherapy does not guarantee non-recurrence, especially for aphthous ulcers caused by psychological stress or immune factors where the etiology is unclear – recurrence remains possible.
Treatment Course Recommendation: Once daily for 3 consecutive days.
-
Day 1: Pain may still be present in the evening
-
Day 2: Continue treatment
-
Day 3: Significant improvement observed
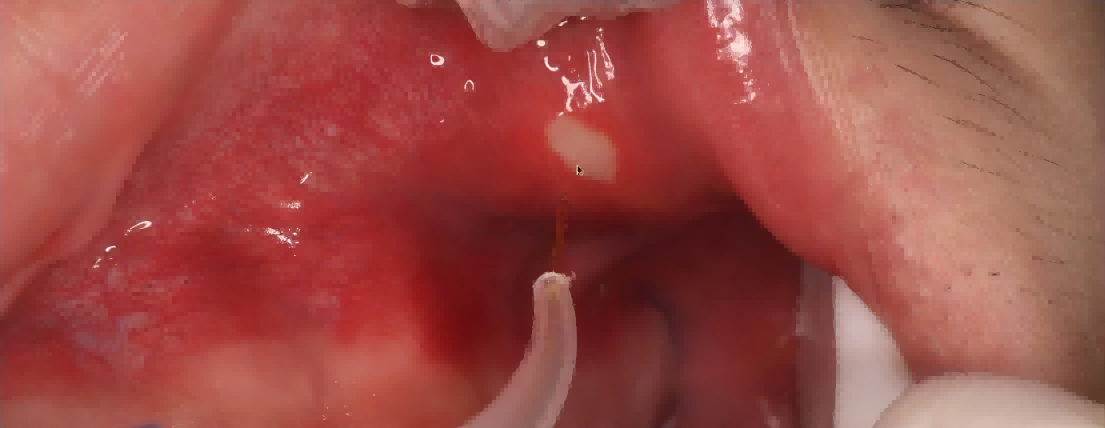
(B) Absolute Contraindication: Do NOT Treat Potentially Malignant Lesions
Lichen planus and leukoplakia both carry a certain risk of malignant transformation.
At the clinical practice level, it is strongly recommended NOT to treat these conditions.
Even though literature reports suggest that semiconductor laser may have some therapeutic effect on lichen planus and a lower carcinogenic risk compared to other lasers – if malignant transformation occurs, the patient will only attribute it to your treatment.
It is not worth taking the “what if” risk for a few hundred yuan in procedure fees.
Clinical Rule for Oral Medicine:
First, ask yourself: “Is malignant transformation possible for this lesion?” If any risk exists, do not perform treatment.
(C) Hemangioma (Vascular Lesion)
Stratified assessment is critical:Type Treatment Outcome Dark venous hemangioma Better response Superficial hemangioma Poor response Technique
Administer local anesthesia.Apply high-energy irradiation until the hemangioma turns dark, shrinks and presents morphological changes.Necrotic tissue will slough off within 2 to 3 weeks.Site Limitations
Location Recommendation Reason Mucosal surface (lip, tongue, floor of mouth) Treatable Minimal aesthetic concerns Skin surface Not recommended Scar formation after healing 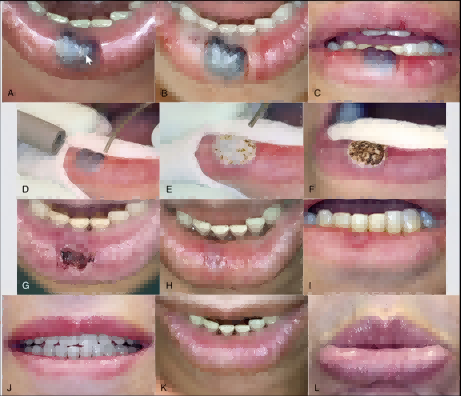
VI. Teeth Whitening: Clarifying the Mechanism of Lasers
Correction of Common Misconceptions
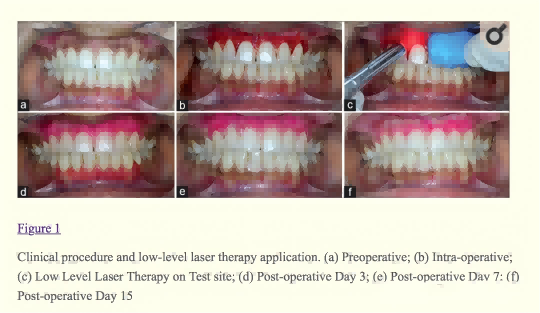
The laser itself cannot whiten teeth.The function of the laser is to activate the whitening gel (main component: H₂O₂), enhancing its permeability and decomposition activity.Laser energy is primarily absorbed by pigments within the gel.Red gel exhibits superior absorption at the 980 nm wavelength.
Procedure
Step Operation 1. Preoperative Examination Check for caries and enamel cracks. Inform patients of possible postoperative sensitivity. 2. Apply Gingival Barrier Light-cure to protect the gingiva 3. Administer 35% hydrogen peroxide whitening gel Apply to a thickness of approximately 1 mm 4. Use dedicated whitening handpiece This is not a standard optical fiber. Maintain a distance of 1–3 mm from the tooth surface (Do not contact the tooth surface; otherwise the gel will spread outward). 5. Irradiation 1–2 minutes per quadrant; roughly 5–6 minutes for the full arch. 6. Remove gel Use high-volume suction. Never wipe with cotton balls or gauze. Contact of the gel with lips and mucosa may cause burns and ulcers. True Advantages of Laser-Assisted Whitening
Comparison Item Conventional Protocol Laser-Assisted Protocol Gel Concentration 40% 35% Postoperative Sensitivity Significant — some patients require analgesics Mild — excellent tolerance Whitening Efficacy Good Comparable to the 40% gel protocol — equivalent effect with fewer adverse sensations